你以為太赫茲療法只適用於高科技實驗室和高風險實驗嗎?那就大錯特錯了。太赫茲(一兆赫茲)設備能發出溫和的脈衝,就像柔和的日出喚醒你的細胞。只要遵循幾個簡單的步驟,你會發現它們用起來出奇地簡單。.
本簡短指南將引導您完成基本設置,以便您安全簡便地完成設備設定。首先進行快速安全檢查,然後拆箱並進行目視檢查。接下來是接地和電源連接,然後是校準(將設備設定為正確的輸出)和探頭測試(手持式塗抹器)。等等,讓我解釋一下,探頭就是您貼在身上的部分。.
你會帶著平靜的自信和實用的技巧結束練習。你是否曾經感受過溫暖專注的觸碰後,緊張感瞬間消散?對了,這裡有個小小撇步:記錄練習過程,這樣你就能追蹤哪些方法對你最有效。放鬆。呼吸。.
太赫茲治療儀入門指南
在啟動任何裝置之前,請先執行以下幾個簡單的安全步驟,以確保一切順利進行:
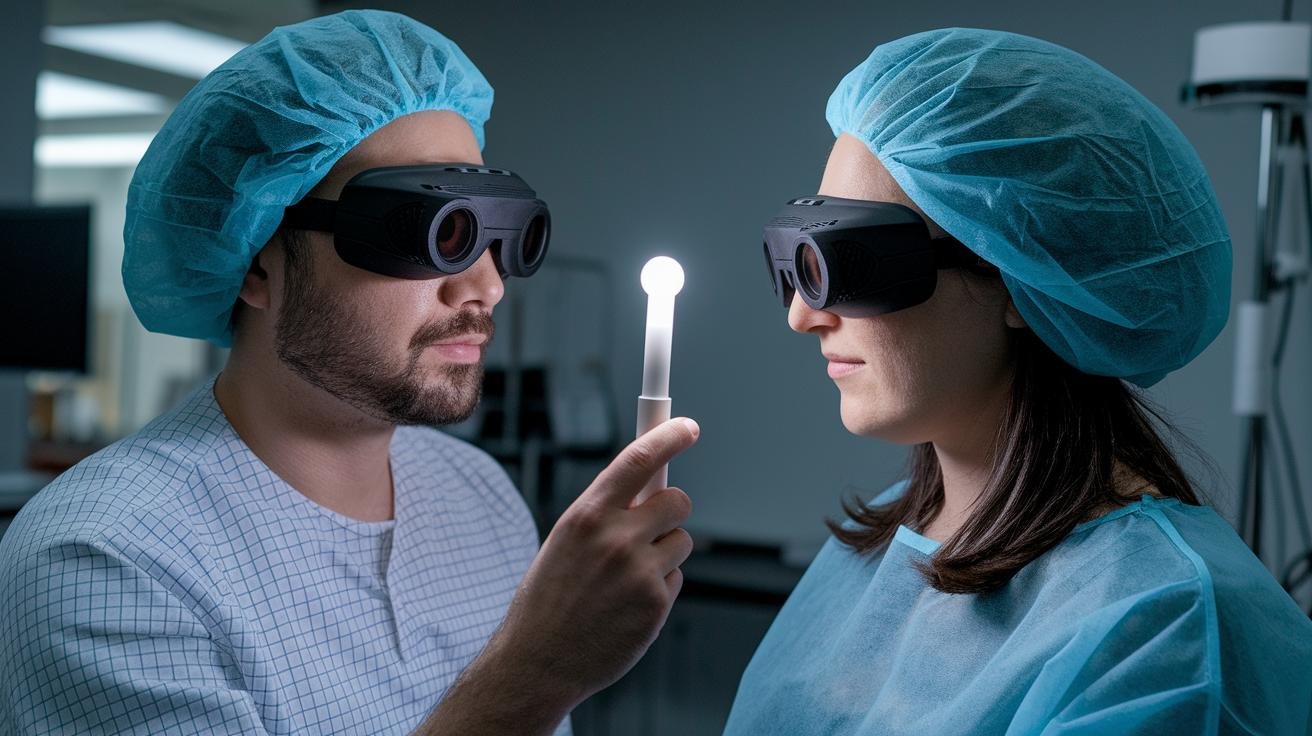
- 開機前請配戴經認證的防護眼鏡。.
- 清理工作區域內的雜物和所有反光錶面。.
- 驗證緊急關機功能是否正常(按住停止鍵)。.
- 請先閱讀快速入門安全卡和太赫茲治療儀使用者指南。.
- 請勿將魔杖靠近眼睛和植入式醫療設備;請保持安全距離。.
- 確保接地線和電源線完好無損,並遠離人行道。.
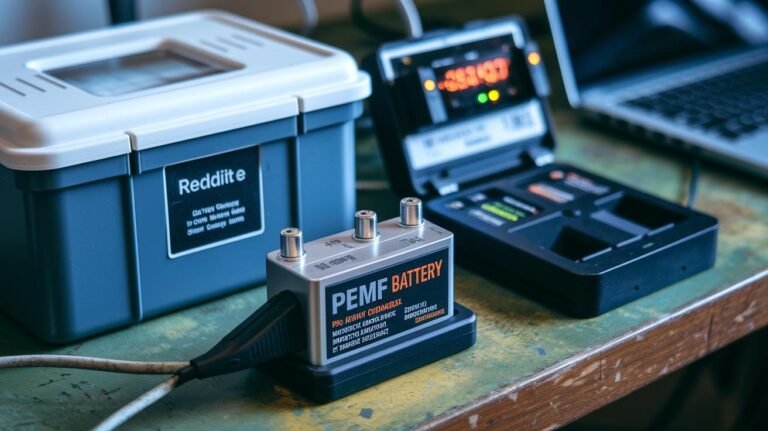
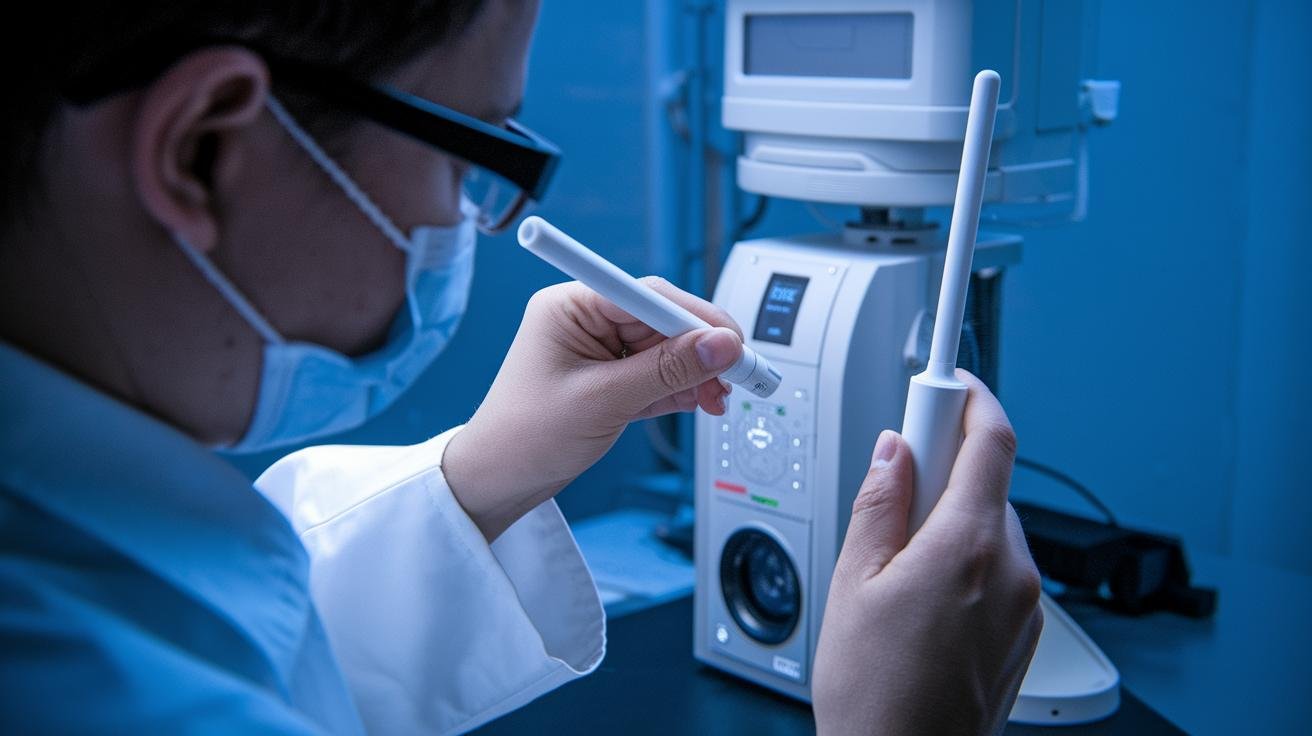
本指南將帶您了解主機、手持式探頭、液晶顯示器、校準墊和緊急停止連鎖裝置。主機包含電源和控制功能。探頭會發出太赫茲(一兆赫茲)頻率,並帶來柔和的溫暖感,如同陽光輕撫肌膚。液晶顯示器會顯示各種模式和計時器。您還將獲得一套帶有註釋的示意圖,以便您能夠指出某個部件並了解其名稱。.
拆箱時,請檢查包裝盒是否有凹陷或破損的邊角,並慢慢打開。將配件平鋪在乾淨的布上,並與使用者指南中的包裝清單進行核對。將加熱棒試裝到支架上,並檢查所有纜線是否有裸露的電線。在手背或前臂等小面積皮膚上進行初步測試,感受溫和的溫熱感。如有任何缺失或損壞,請在安裝前聯絡技術支援。.
若要連接電源,請將隨附的接地電纜插入專用插座,並將電纜遠離門和繁忙通道。開機前,請確認電源模組上的保險絲狀態。開機後,進入校準模式,並將探頭放在校準墊上。設備將進行自動校準,確認基線輸出,並儲存出廠設定檔。請完成使用者指南中的設定清單,並查看… 如何使用太赫茲治療棒 方便攜帶的手持式小號。.
詳細安裝說明和組件識別表
安裝/機械組裝
- 首先將魔杖支架固定到底板上。對準定位銷,用手擰緊螺絲,然後用螺絲起子再將每個螺絲擰四分之一圈,確保所有部件都牢固就位。感受一下配合情況,所有部件都應該緊密貼合,而不是硬塞進去。.
- 使用四個標記好的安裝孔將底座固定在主機上。使用隨附的墊圈,並均勻擰緊每個螺絲,以防止晃動或傾斜。.
- 將顯示模組安裝到支架上,然後將扁平連接器卡入介面插座。正確安裝時會聽到輕微的咔嗒聲,請相信這個聲音。.
- 將魔杖電纜穿過固定夾和後方電纜槽。用小型紮帶固定應力消除點,以防止電纜在使用過程中拉扯連接器。.
給予組裝說明時,請使用以下措詞:
“將魔杖支架固定到底板上。對準定位銷,用手擰緊螺絲,然後用螺絲刀將每個螺絲再擰四分之一圈,確保所有部件都牢固就位。”
電源連接詳情
接通電源前,請確認設備的序號標籤與電源上的功率模組額定值相符。檢查電源上的保險絲座(小型保險絲座);保險絲的規格必須與標籤上標示的規格一致。若保險絲規格錯誤,請勿通電,先更換保險絲。.
將三腳接地連接器插入接地良好的專用插座。如果您有插座測試儀,那就太好了,用它來驗證接地是否良好。如果需要更長的距離,請使用適用於醫療或工業負載的重型接地延長線,並且不要將多餘的電纜盤繞起來。盤繞的電纜容易累積熱量或造成乾擾。.
佈線時,請使用後部的線纜夾,並留出一段略微鬆弛的線段,以免線纜穿過門框或被擠壓。將手持花灑的線固定在應力消除裝置處,防止正常移動時拉扯連接器。另外,切勿將電源線鋪設在地墊下方或加熱器後方。.
有關控制面板的完整操作指南,請參閱第 3 節,其中涵蓋了每個按鈕、LED 指示燈和選單項目。.
控制面板操作流程及操作手冊概述
控制面板就是您的控制中心——它由一系列簡潔的開關、按鈕和一個柔和發光的液晶顯示器組成,顯示器上會顯示會話模式、時間和輸出百分比。佈局方面,安全控制按鈕位於左側,會話控制按鈕位於中間,導航鍵則位於螢幕下方,方便您的手在各個控制按鈕之間自然移動。您可以把它想像成駕駛一艘小船:簡單的操縱桿和清晰的顯示器有助於保持操作的穩定性。.
- 電源開關:開啟或關閉主電源,喚醒液晶顯示屏,以便您可以存取選單。.
- 緊急停止:立即切斷輸出,並將設備送入安全待機狀態。.
- 開始/停止:啟動或結束目前治療療程,而不會更改您儲存的預設。.
- 強度 +/-:以螢幕上顯示的清晰百分比步長增加或減少輸出。.
- 定時器設定:選擇會話時長(5 至 30 分鐘),然後按選擇鍵確認。.
- 模式選擇器:循環切換會話模式,並從使用者選單載入已儲存的使用者設定檔。.
- 導航鍵(捲動、選擇、返回)和 LED 三色指示燈:綠色 = 狀態,紅色 = 錯誤,琥珀色 = 校準警報。.
LCD選單操作流暢便捷。捲動選擇訓練模式,按「選擇」鍵設定強度或時間,然後按「返回」鍵返回主畫面。已儲存的設定檔位於「使用者」選單下,方便您快速呼叫常用設置,無需重新輸入參數。.
對了,校準運行時,琥珀色 LED 指示燈會閃爍,螢幕會顯示進度。如果感覺有什麼不對勁,請查閱操作手冊,取得完整的錯誤代碼清單和逐步故障排除指南。別擔心,你很快就能上手。.
校準、強度調節和定時器配置
從這裡開始,確保你的使用過程穩定舒適。你可以把它當作一個快速檢查清單,確保設備準備就緒,並且輸出效果符合預期。.
步驟——校準、強度和計時器
每次會話前,請檢查:
- 檢查校準狀態(查看螢幕上是否顯示「CAL OK」或最近的日期/時間)。.
- 確認強度百分比(例如,「強度:45%」)。.
- 查看顯示的計時器分鐘數(例如,「計時器:20 分鐘」)。.
校準-步驟詳解:
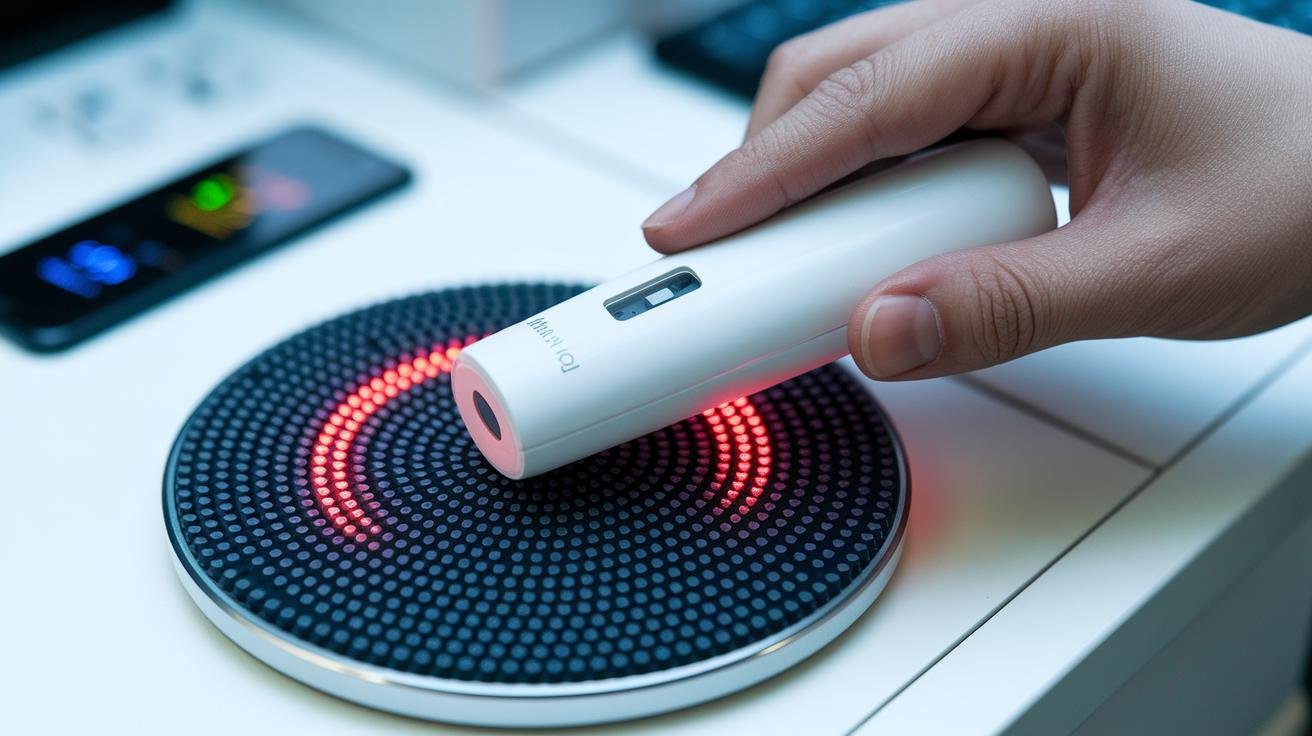
- 將魔杖尖端平放在校準墊的中心位置,確保其放置平穩。.
- 開機,按選單鍵,捲動至校準模式,然後按選擇鍵。.
- 讓設備進行自動檢查;測量基準時,琥珀色 LED(指示燈)會閃爍。.
- 如果出現提示,請接受顯示的基線值。如果讀數出現跳躍,請重試一次。.
- 當螢幕顯示「校準完成」時,請移除測量棒。如果設備提示儲存出廠設定文件,請儲存。.
設定訓練強度和訓練時長-步驟如下:
- 按下啟動/停止鍵喚醒面板,然後使用模式選擇器選擇會話模式。.
- 使用強度+或-(或旋鈕)設定輸出。觀察液晶顯示器上的百分比值,以便了解目前輸出的強度。.
- 按下定時器設定鍵,捲動到所需的長度(5-30 分鐘),然後按下確認鍵。.
- 如果需要,可以載入已儲存的使用者設定文件,預設強度和時間,然後按「開始」按鈕開始。.
小提示:如果感覺不對勁,請停止,重新檢查校準,並嘗試降低強度。放鬆。深呼吸。.
治療方案、患者體位及安全連鎖裝置
開始時每次療程時間要短,頻率要穩定。如果您是新手,建議每次嘗試 5 到 10 分鐘,觀察身體的反應。通常情況下,每個部位每次療程 10 到 30 分鐘,每週進行兩到三次,用於日常維護或恢復。注意傾聽身體的反應;如果您感到異常發熱或發現發紅持續不消退,請立即停止療程並休息。.
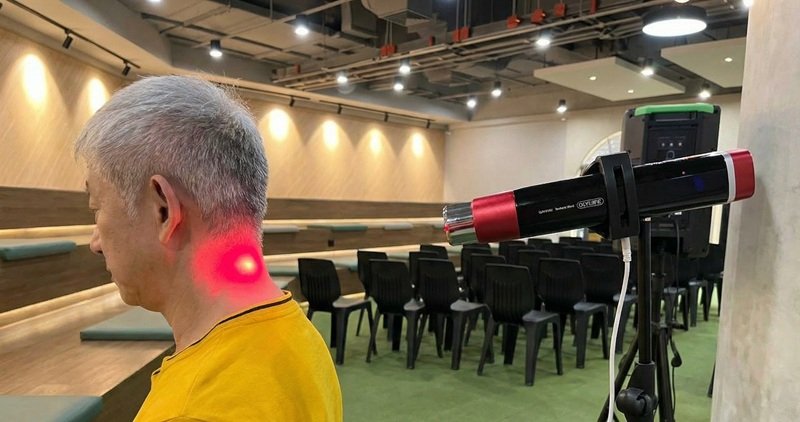
- 進行大面積美白時,請將美白棒與皮膚保持 8 到 12 英吋的距離。這個距離能帶來如同晨曦般柔和的溫暖,而不會產生局部過熱。.
- 將治療棒大致垂直於治療表面,並以緩慢的圓週運動方式移動,使能量均勻擴散。想像一下,就像在進行輕柔的按摩。.
- 進行專注拍攝時,可以稍微靠近一些,但縮短拍攝時間,以免刺激眼睛。短時間、針對性的連拍效果比長時間近距離曝光更好。.
- 使用本設備時,請務必配戴經認證的防護眼鏡,切勿將探頭對準眼睛。安全第一。.
- 不要處理開放性傷口、活動性皮疹或植入式電子設備(如心臟起搏器)附近的區域。.
- 開始時強度較低,持續時間較短,然後隨著訓練的進行,逐漸增加強度和持續時間。.
緊急關機說明
安全連鎖裝置旨在快速、安靜地停止治療。如果治療棒從支架上抬起、安全蓋打開或系統偵測到異常情況,輸出將立即切斷,設備進入安全待機狀態。如需手動觸發緊急停止,請按住停止按鈕三秒鐘;所有裝置將停止運作,液晶顯示器將返回主畫面。在任何聯鎖事件發生後,請等待裝置顯示「READY」(就緒)並執行快速校準檢查,然後再重新啟動。.
雜散光束會從光滑表面反射,照射到敏感區域。治療時,請確保鏡子、金屬托盤和玻璃製品遠離治療區域;調整治療頭角度,使光束指向正在治療的組織;治療期間,請旁觀者和寵物遠離治療區域。另外,還有一個小技巧:如果無法移動反光物品,可以用毛巾蓋住。.
維護計劃、清潔程序和鏡片護理
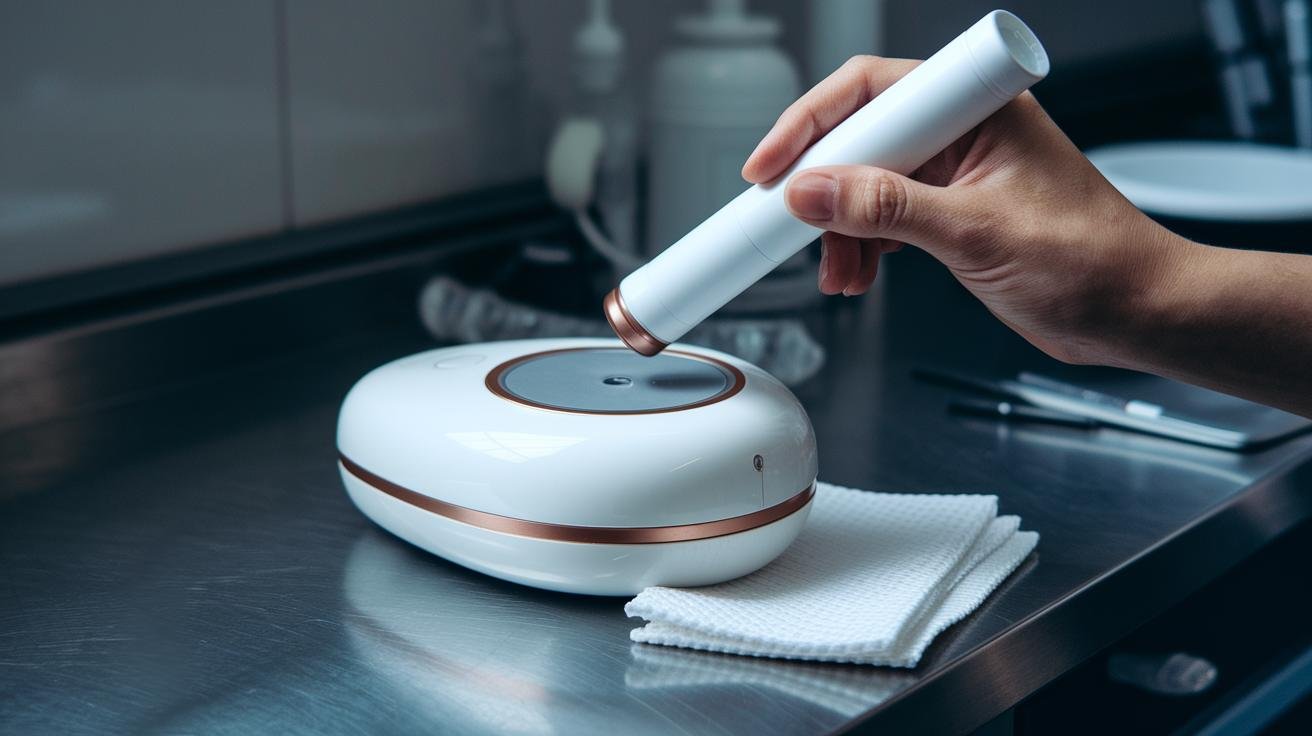
日常保養能讓您的設備保持良好狀態,使用體驗更佳。重度使用後擦拭機身,每次使用後對探頭進行消毒,每月檢查連接線,每六個月或使用約 500 小時更換一次內置濾芯,並用鏡頭紙和光學清潔劑輕輕清潔鏡頭。小步驟,大回報。.
用沾有 70% 異丙醇(異丙醇)的柔軟無絨布清潔外殼。請勿將清潔劑直接噴入通風口或縫隙中。等等,讓我解釋一下:先將布沾濕,然後再擦拭。動作要輕柔緩慢,並感受是否有黏性殘留;通常再擦拭一次即可清除。.
每次使用後立即對按摩棒頂端進行消毒。可使用一次性酒精濕紙巾或隨附的消毒棉片。將按摩棒放回支架前,請讓其自然風乾。對了,還有一個小撇步:如果感覺有點黏,可以再輕輕擦拭一遍。.
每月檢查一次電纜和連接器。檢查絕緣層是否磨損、是否有僵硬部分或針腳鬆脫。如果發現任何異常,請貼上標籤並在使用設備前聯絡技術支援。防患於未然總是好的。.
每六個月或運轉時間達到約 500 小時時更換線上濾芯(空氣濾芯)。每次更換時請記錄日期和小時數,以免遺忘。簡單的記錄可以避免日後的麻煩。.
鏡片保養需要格外小心。請使用鏡片紙和溫和的光學清潔劑,以輕柔的打圈方式擦拭。切勿使用粗糙的布料或紙巾用力擦拭。不要用手指觸摸鏡片;手指上的油脂會導致鏡片出現熱點。.
請將設備存放在乾燥穩定的環境中,溫度保持在攝氏 15 至 30 度(59 至 86 華氏度),並置於其軟墊保護套或櫃子中。如果您打算長期存放或旅行,請將探頭從支架上取下,鬆散地纏繞電線,並保留原始包裝。.
| 任務 | 頻率 |
|---|---|
| 清潔(外殼和刷頭) | 頻繁使用後,每次使用後請對按摩棒尖端進行消毒。 |
| 檢查(電纜和連接器) | 每月 |
| 更換濾芯 | 每6個月或約500小時 |
| 鏡片護理 | 依需求;每次集中訓練前進行檢查 |
🎁 領取免費健康禮品
在下方輸入您的姓名和電子郵件地址,即可免費獲得 OlyLife 提供的特別健康禮物!
常見錯誤故障排除、重設步驟和支援聯絡方式

如果您的設備發生故障,請在尋求協助之前先進行一些簡單的檢查。這些快速步驟通常可以解決問題並節省時間。.
- 首先檢查電源。確保三腳插頭完全插入。嘗試使用另一個確認正常的插座。檢查是否有斷路器跳脫或插座測試器跳脫。.
- 檢查電源模組上的保險絲(小型可更換安全保險絲)和保險絲座。如果保險絲熔斷,請更換為標籤上標示的同型號保險絲,然後再嘗試啟動設備。.
- 如果螢幕凍結或出現異常情況,請嘗試軟重啟:關閉電源,拔掉電源線 10 秒鐘,重新插上電源線,然後開機。如果問題仍然存在,請同時按住「開始」和「停止」鍵 5 秒鐘,以啟動裝置重設程式。.
- 如果輸出不穩定,請重新執行自動校準(自動校準是裝置的自我檢測功能)。將探頭放在校準墊上,然後選擇校準模式。如果校準不穩定或持續失敗,請記下螢幕上的任何代碼並停止使用該裝置。.
- 如果裝置摸起來很燙、聞到燒焦的氣味、看到冒煙或螢幕上出現 E01 代碼,請立即關閉電源,拔掉電源插頭,並在技術人員檢查之前不要使用裝置。安全第一。.
| 錯誤代碼 | 描述 |
|---|---|
| E01 | 偵測到過熱-系統斷電;需要人工檢查。 |
| E02 | 校準失敗-基線不穩定;請重試校準或聯絡技術支持 |
如需技術支持,請發送電子郵件至 support@manufacturer.com 或致電 1-800-123-4567。聯絡技術支援時,請準備好您的裝置序號和準確的錯誤代碼或對故障現象的清晰描述。如需更換零件或進行保固索賠,請使用保固入口網站或聯絡技術支援團隊。申請零件或維修服務時,請準備好設備照片、購買日期以及任何運輸損壞詳情。.
軟體介面導航和韌體升級過程
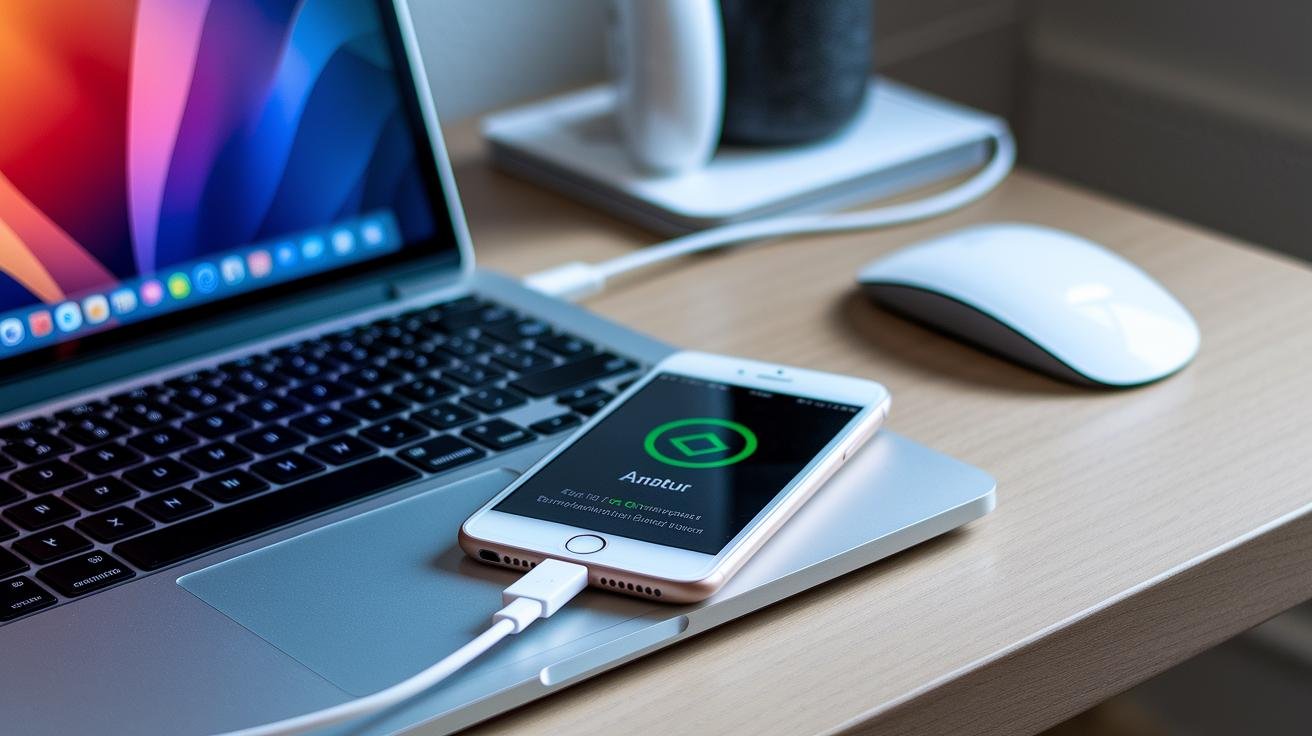
開始之前,請確保您的電腦運行的是 Windows 10 或更高版本,有一個空閒的 USB-A 連接埠(標準的矩形 USB 介面),並且您已使用管理員權限登入。從裝置製造商下載最新的驅動程式包,並準備一個格式化為 FAT32(一種常見的檔案系統)的備用 USB 隨身碟。啟動裝置並喚醒 LCD 顯示屏,以便在更新過程中查看進度條。做好充分的準備工作有助於整個過程更加順利。.
幾個小習慣就能避免很多麻煩。.
- 在更改設定之前儲存一個命名設定文件,以便您可以恢復到先前的狀態。.
- 使用常用會話的參數預設可以加快設定速度並減少調整次數。.
- 會話結束後檢查資料日誌,以發現輸出、運行時間或警告的趨勢。.
- 將設定檔匯出到 USB 時,請為其命名並註明日期,以免版本混淆。.
- 瀏覽選單時要緩慢操作:捲動、選擇,然後確認。誤操作很容易發生,但如果您已儲存設定文件,則可以輕鬆撤銷。.
韌體更新逐步指南
- 導出當前設定。將USB插入前面板端口,依序選擇“用戶”→“備份”,選擇檔名,然後匯出設定檔。等待「匯出完成」訊息出現後再拔出USB。.
- 準備更新程式。從製造商網站下載韌體文件,並將更新程式(.bin 檔案)複製到同一 USB 隨身碟的根目錄。確認文件大小與供應商提供的說明相符,以確保複製正確。.
- 運行更新程式。將 USB 插入設備,開啟“選單”→“韌體更新”,選擇文件,然後執行更新程式。注意觀察液晶顯示屏,更新過程中請勿關閉設備電源。耐心等待。.
- 完成更新後,待更新程式顯示新版本後,重新啟動裝置。如果您的設定已更改,請透過「使用者」→「復原」匯入您已儲存的設定檔。.
新增乙太網路介面進行遠端診斷?這主意不錯,但務必小心。將裝置連接到安全網絡,使用強密碼,並封鎖未知IP位址。安裝韌體時斷開網路連接,以免中斷。諸如此類的安全措施能確保遠端存取的有效性和安全性。.
操作過程中遇到問題?暫停一下,檢查備份,然後再試一次。放鬆,你一定能做到。.
法規遵從性、認證和保固範圍
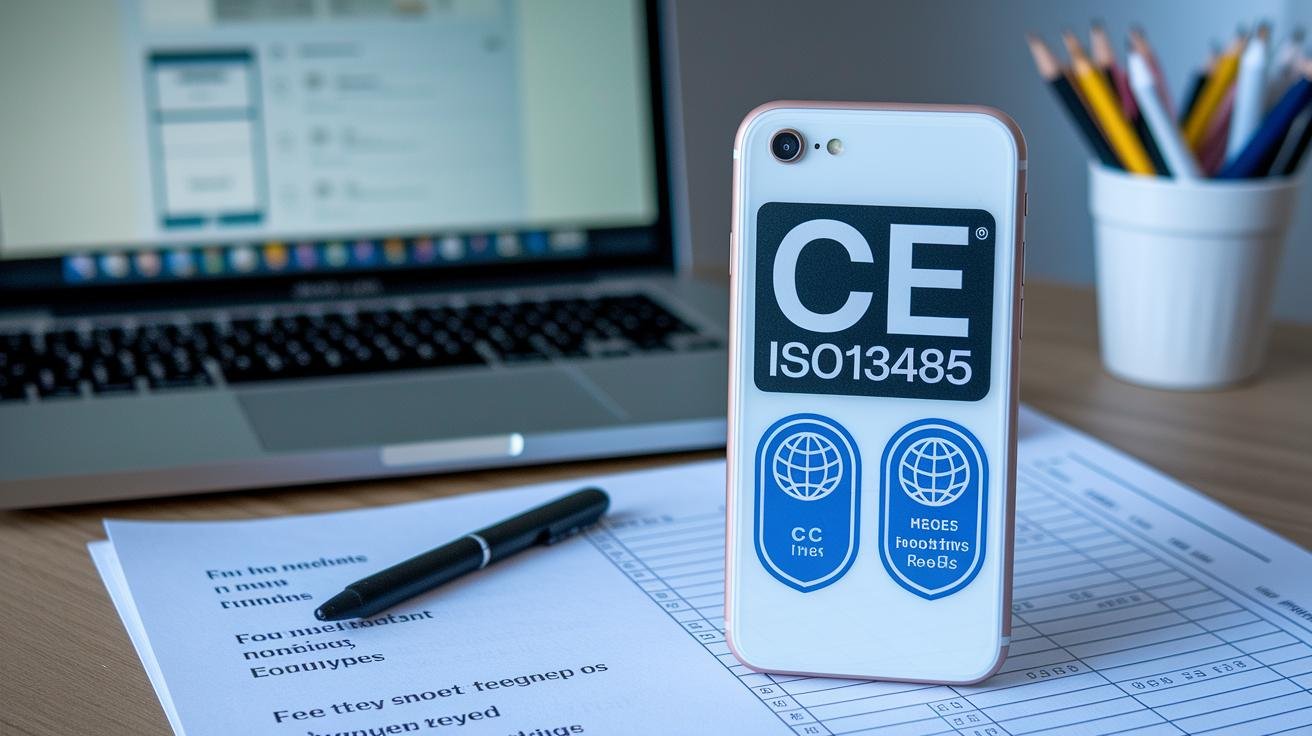
本設備已獲得CE認證,並依照ISO 13485品質標準製造,符合歐盟安全和製造規範。它工作在非電離太赫茲頻段(0.1-10 THz),該頻段產生的是高頻電磁波,類似於輕柔的能量嗡嗡聲,而非電離輻射。本設備已根據適用的歐盟醫療器材指令進行評估。.
你有沒有想過這些標籤到底是什麼意思?
- CE標誌:表示符合歐盟安全、健康和環境要求。.
- ISO 13485:醫療器材製造企業的品質管理系統。.
- 監管狀態:工作在非電離的 0.1-10 THz 範圍內;未獲得美國食品藥物管理局 (FDA) 批准作為醫療器材。.
這對您意味著什麼?該產品在美國作為健康器材銷售,並非經過FDA批准的醫療器材。如果您打算在診所或用於患者護理,請務必事先了解當地法規、機構政策以及任何許可要求。.
保固和售後服務非常簡單。本產品享有 12 個月的有限保修,保固範圍涵蓋材料和工藝缺陷,購買時可選擇延長保固期。如需提出索賠,請造訪製造商支援入口網站,並準備好您的產品序號、購買憑證和清晰的照片。如果您需要協助,請按照使用者指南中的聯絡方式進行操作,或聯絡您購買產品的經銷商。.
結語
在操作過程中,我們首先進行了安全檢查,包括佩戴認證眼鏡、清理空間、緊急停止,然後參觀了主機、魔杖和液晶顯示屏,接著進行了開箱、電源連接和首次運行校準。.
您已經學習了控制面板的基本操作、校準步驟、會話時間控制、定位技巧、清潔和故障排除。第一次使用時,請放慢速度,觀察顯示屏,並進行細微的強度調整。.
使用本太赫茲治療儀使用者指南作為快速參考,享受更平靜、更輕鬆的恢復期。.
常問問題
Prife手冊,Prife國際行銷計劃PDF
Prife 手冊和行銷計畫 PDF 提供了設定、安全性和促銷詳情;請查看 Prife 的官方支援或授權經銷商入口網站,以取得經過驗證的規格、圖表和可下載的文件。.
iTera 設備評估、iTeraCare 設備是否可靠、iTera Care 設備價格、iTera 機器用途、iTera 療法、iTera 高級熱風吹風機
iTeraCare 設備以太赫茲健康療法為賣點。評價褒貶不一,價格因型號而異,常見用途包括緩解疼痛和促進血液循環;部分型號還配備熱風吹送功能。.
太赫茲療法的缺點是什麼?太赫茲對身體有什麼影響?太赫茲對關節炎有效嗎?太赫茲能緩解疼痛嗎?
太赫茲波主要作用於表層組織,產生溫和的溫熱感,並可能引發細胞反應。一些用戶報告稱其能緩解疼痛和關節炎症狀,但其缺點包括長期數據有限、某些設備使用時需要佩戴護目鏡以及臨床療效不一。.