Have you ever felt a PEMF (Pulsed Electromagnetic Field therapy) session miss the spot? It could be one tiny placement mistake. Placement matters more than cranking up intensity, because the field only helps when it actually reaches your tissues. Think of your coil like a morning sun. Tiny shifts change where the warmth lands.
This quick, practical guide walks you through the landmarks to target, how to orient the coil, ideal gap and coil shape, plus timing and strap tips so your sessions feel safe, focused, and easy. Oh, and here’s a neat trick to remember the right spot. By the end, you’ll know exactly where to put coils for better results.
PEMF Coil And Applicator Placement Guide Made Easy
PEMF (Pulsed Electromagnetic Field therapy) works best when the coil sits where it can reach the tissues. Think of it like a gentle sunrise waking up your cells. This short guide walks you through placement, settings, and simple fixes so your sessions feel safe, focused, and easy.
-
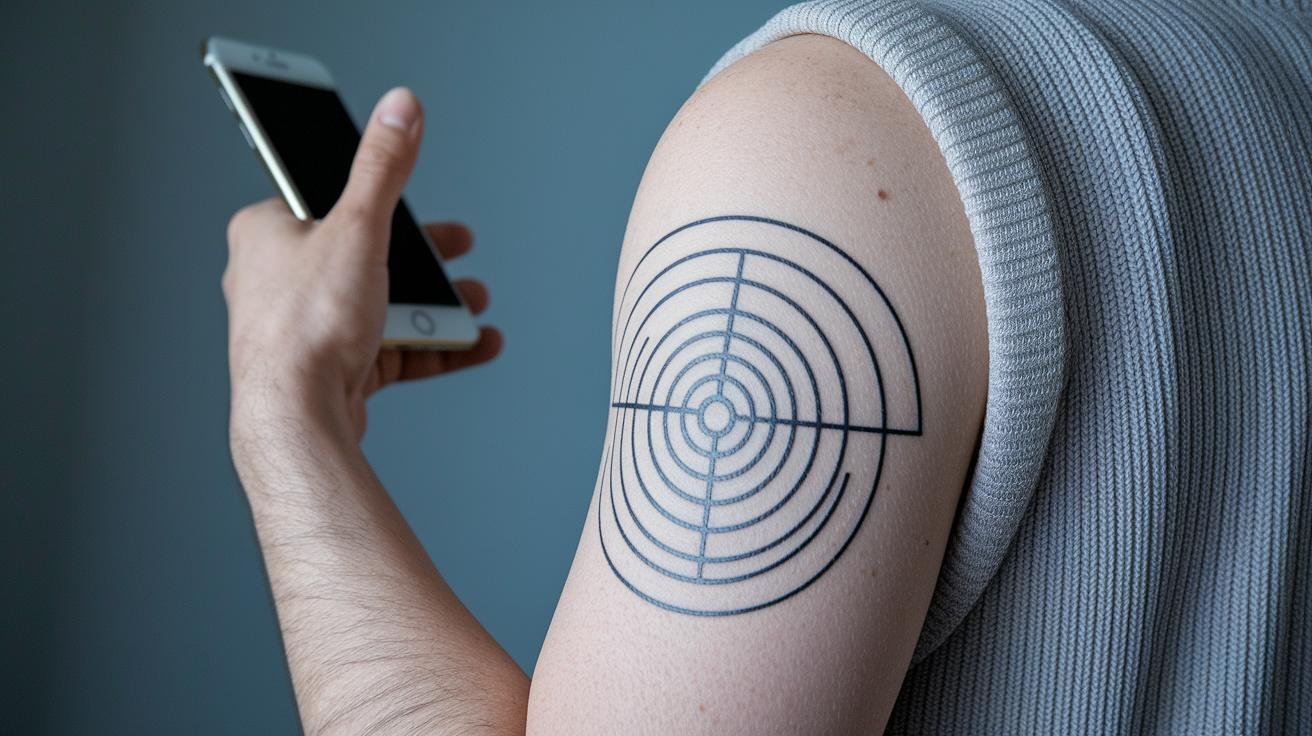
Find the target using clear landmarks. For joints, center the coil on the joint line. For the lower back, aim for vertebrae L3 to L5. For muscles, rest the coil over the muscle belly. Simple and steady.
-
Check coil orientation. Put the side with the big printed circle toward the skin. Make sure the coil is flat and level. No tilt. Flat contact helps the field hit the right spot.
-
Set the coil-skin gap to 0–2 cm. Light contact (0 cm) usually gives the strongest field. A small gap will lower intensity. If you want more comfort, try 1–2 cm and gently increase intensity if needed.
-
Pick the right coil shape. Use round coils for knees, elbows, and small joints. Use rectangular coils or larger pads for wide muscle groups like quads or the back. Match the coil to the area.
-
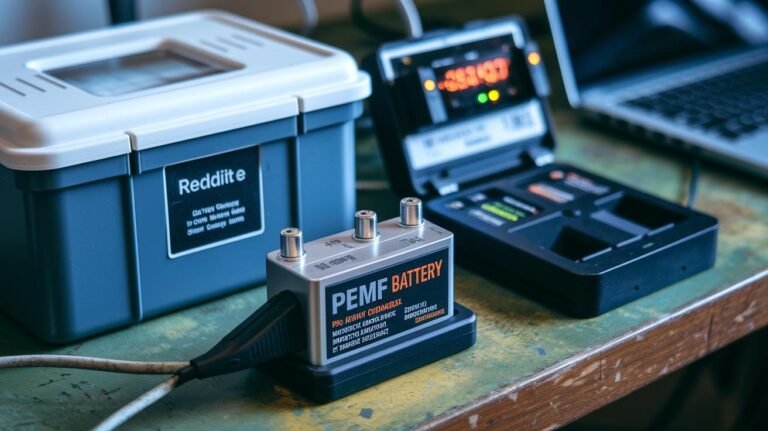
Favor single-coil mode for full power. One coil gives the highest intensity on this device, up to 200 Gauss. Running two coils at once reduces power per coil and shortens battery life. Good to know before you start.
-
Secure the coil so it won’t move. Use sweat bands, Ace wraps, athletic tape, or snug clothing. If the coil shifts, rewrap or add a strap. Little adjustments keep the session steady.
-
Choose frequency and intensity to match your goal. Low frequencies (about 5–15 Hz) tend to help pain relief. Moderate frequencies up to around 50 Hz support tissue repair and circulation. Start low, around 10–20 Gauss, then raise slowly if it feels OK.
-
Time the session and stay still. Typical sessions run 10–30 minutes. Treat one focused area at a time to avoid overloading. Relax. Breathe.
-
Quick setup checklist before you start: confirm coil type and size, check landmark placement, set frequency and intensity, start the timer, and make sure the user is comfortable.
-
Troubleshoot common placement issues: if you feel nothing, recheck orientation and the 0–2 cm gap. If the coil moves, secure it better. If the battery drains fast, switch to single-coil mode. Small fixes go a long way.
Why orientation and distance matter
Magnetic field strength falls off fast with distance, so keeping the printed circle facing the skin and a 0–2 cm gap helps the field reach tissues while balancing comfort and device power. Think of it like holding a flashlight close to a book – brightness drops when you pull away.
Target table for quick reference
| Body Area | Landmark | Coil Type | Recommended Gap |
|---|---|---|---|
| Head / Crown | Top of the skull | Circular | 0–1 cm |
| Lumbar Spine | Lower back vertebrae L3–L5 | Rectangular or lumbar pad | 0–2 cm |
| Kneecap | Center of the patella | Circular | 0–1 cm |
A few final notes
Have you ever noticed how small shifts change the result? Little placement tweaks can feel huge. Start slow, keep sessions focused, and listen to your body. If you’re unsure about spine or head use, check with a clinician first. Relax. You’ve got this.
Why orientation and distance matter
The magnetic field is strongest along a coil's axis. So point the printed circle toward your skin and keep the coil flat and centered. That directs the field where you want it, like aiming a flashlight at a spot. Relax.
Field strength falls off fast as distance increases. Even a tiny air gap or a tilted coil will scatter the field and cut how deep it reaches. Have you ever felt it barely touch you when it was even a hair away? Small changes matter.
Orientation, gap, coil shape and pulse frequency all work together to set penetration. Lower frequencies usually target the nervous system and pain pathways , they feel like a slow, deep thrum. Mid-range pulses tend to favor tissue repair and feel more like a gentle tap encouraging recovery. Technical note: device range 3-1,000 Hz (Hz = cycles per second).
So, for deeper effect keep the coil flat and snug against the skin, centered over the area you want to treat, and pick the frequency that matches your goal. Then, breathe and notice the difference.
PEMF Coil Placement for Head, Neck, Shoulders, and Spine
For a quick background on PEMF (Pulsed Electromagnetic Field therapy), see PEMF technology overview. Below are clear, practical placement tips for the axial areas, easy to follow and ready for use.
-
Head – crown or base of skull
- Place a circular coil centered over the crown, or set it at the base of the skull for more brainstem focus.
- Keep the printed side facing the skin and leave a small gap for comfort, about 0-1 cm.
- Secure the coil with headgear or a soft band so it won’t slide. You want steady contact, not pressure.
-
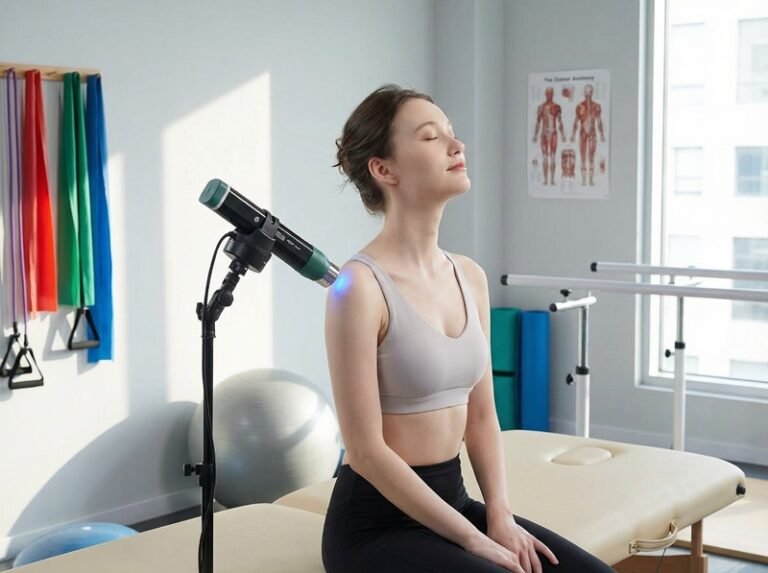
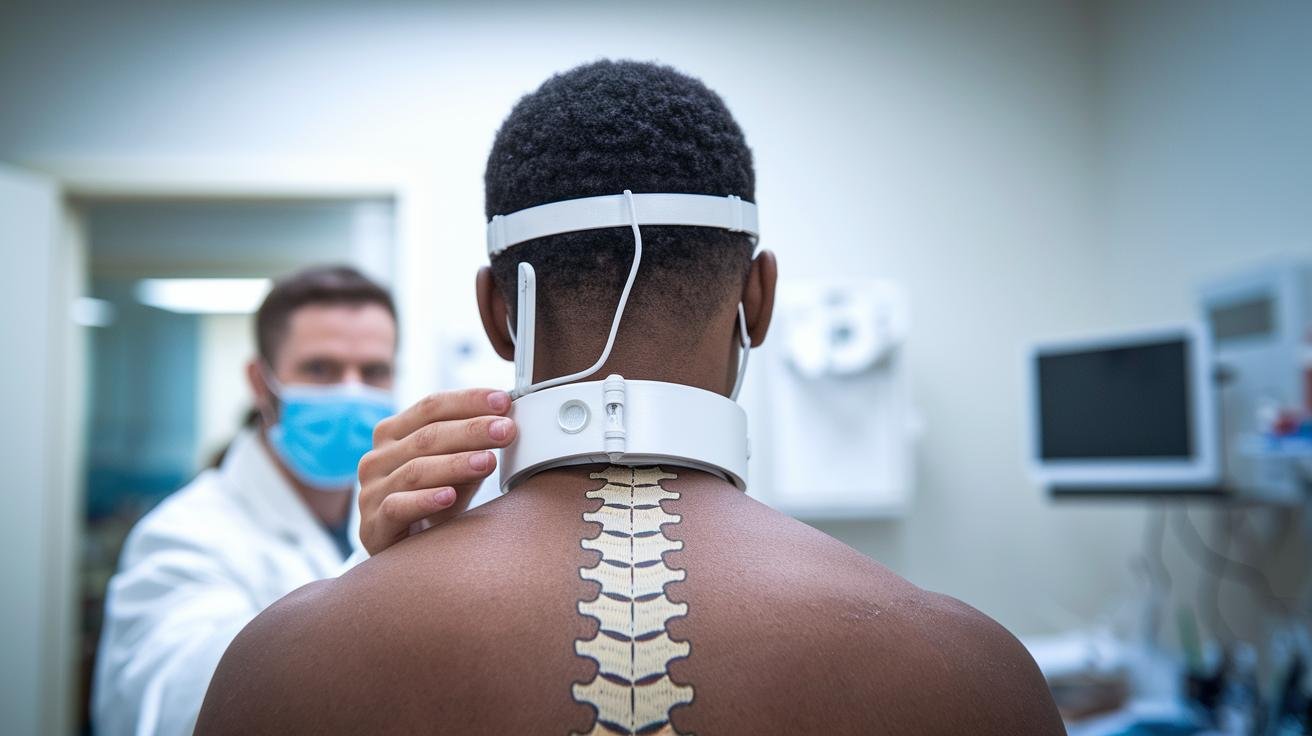
Neck – collar and cervical alignment
- Use a collar-style applicator and align it over C4-C7, following the natural curve of the neck.
- Light contact is fine; aim for even pressure and a 0-2 cm gap depending on how it feels.
- Tuck the cable away so it won’t pull during the session. Wait, let me clarify that: loose cables can shift the coil mid-session, so secure them.
-
Shoulders – acromion and deltoid coverage
- For the joint, center a circular coil on the acromion. For muscle work, lay a rectangular coil across the deltoid.
- Keep the coil flat and use an elastic strap or athletic tape to hold it snug.
- Treat one shoulder at a time if you want deeper focus. Relax. Breathe.
-
Upper back – thoracic placement (T7-T12)
- Place a rectangular applicator flat over T7-T12, lining it up with the spine’s midline.
- A longer pad can cover several vertebrae if you need broader coverage.
- A soft pillow under your chest helps keep even contact without extra pressure.
-
Lower back – lumbar focus (L3-L5)
- Center the coil over L3-L5 and stabilize it with a lumbar support belt or wide wrap.
- Keep the gap about 0-2 cm and, if you want the strongest local effect, use single-coil mode.
- Check comfort often and adjust strap tension to avoid pinching.
Common-sense tips: start at lower intensities while you get used to the feeling. Think of the coil like a gentle, targeted massage for tissue and nerves. Have a friend help with placement if you can’t reach comfortably. In truth, small adjustments make a big difference.
| Body Region | Coil Type | Distance from Skin | Recommended Frequency |
|---|---|---|---|
| Head / Crown or Base | Circular coil / headgear | 0-1 cm | 3-15 Hz (Hz = cycles per second; calming / nervous system) |
| Neck (C4-C7) | Collar applicator | 0-2 cm | 5-15 Hz |
| Shoulder (acromion / deltoid) | Circular (joint) / Rectangular (muscle) | 0-1 cm | 5-30 Hz |
| Upper Back (T7-T12) | Rectangular pad | 0-2 cm | 10-50 Hz |
| Lower Back (L3-L5) | Rectangular / lumbar pad | 0-2 cm | 10-50 Hz |
Targeting Arms, Legs, and Joints with PEMF Applicators
PEMF (Pulsed Electromagnetic Field therapy) uses gentle pulses of energy to support joints and muscles. Think of it like a soft, warming hum that helps tissue feel more ready and relaxed. Have you ever wanted a focused, easy way to target a sore spot? This guide walks you through practical coil placements so you can get steady contact and comfortable sessions.
-
Wrist
Center a small circular coil right over the wrist joint where the wrist bends (radiocarpal line). Use a small circle for the joint itself or a slightly larger oval to include nearby tendons. Keep contact even , a light elastic wrist wrap works well. Relax. -
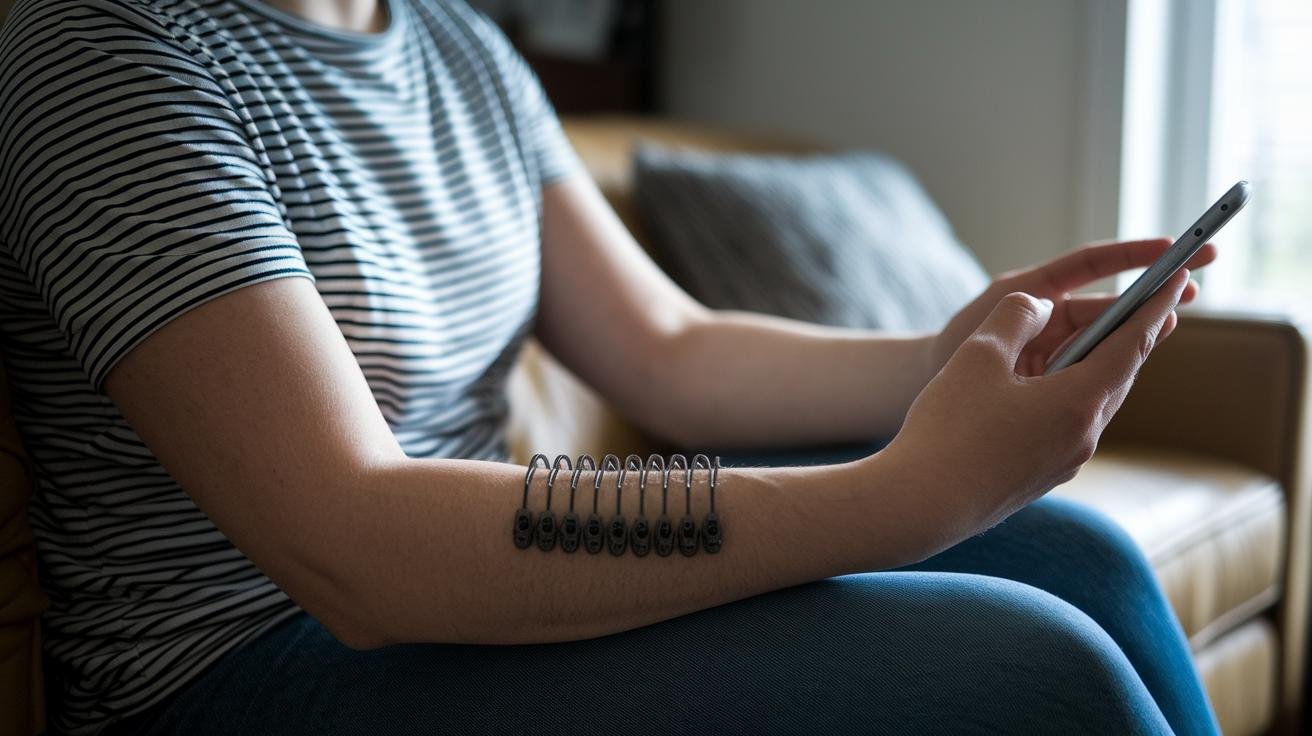
Elbow
Lay the circular coil over the elbow crease so the coil’s center lines up with the joint. For tennis or golfer’s elbow, slide the coil about 1-2 inches into the forearm muscle to hit the irritated tendons. Secure it with athletic tape or a sweat band so it won’t shift during the session. -
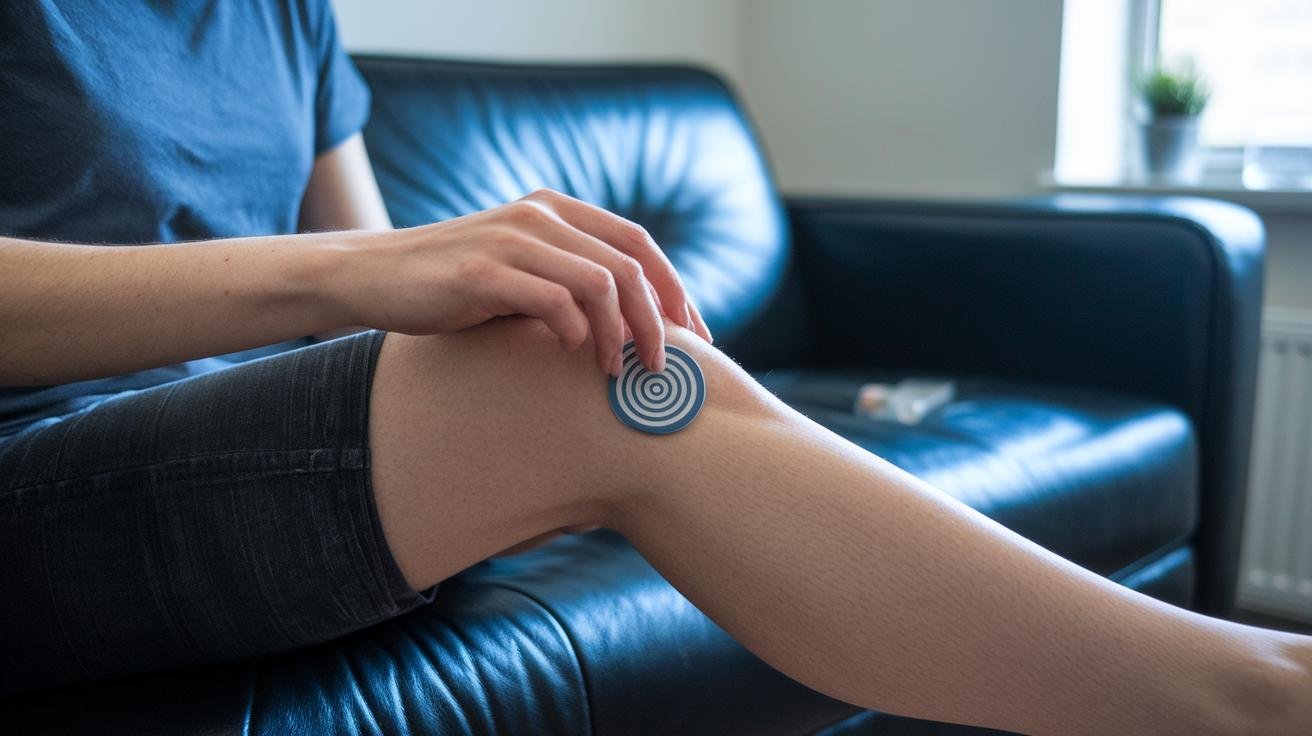
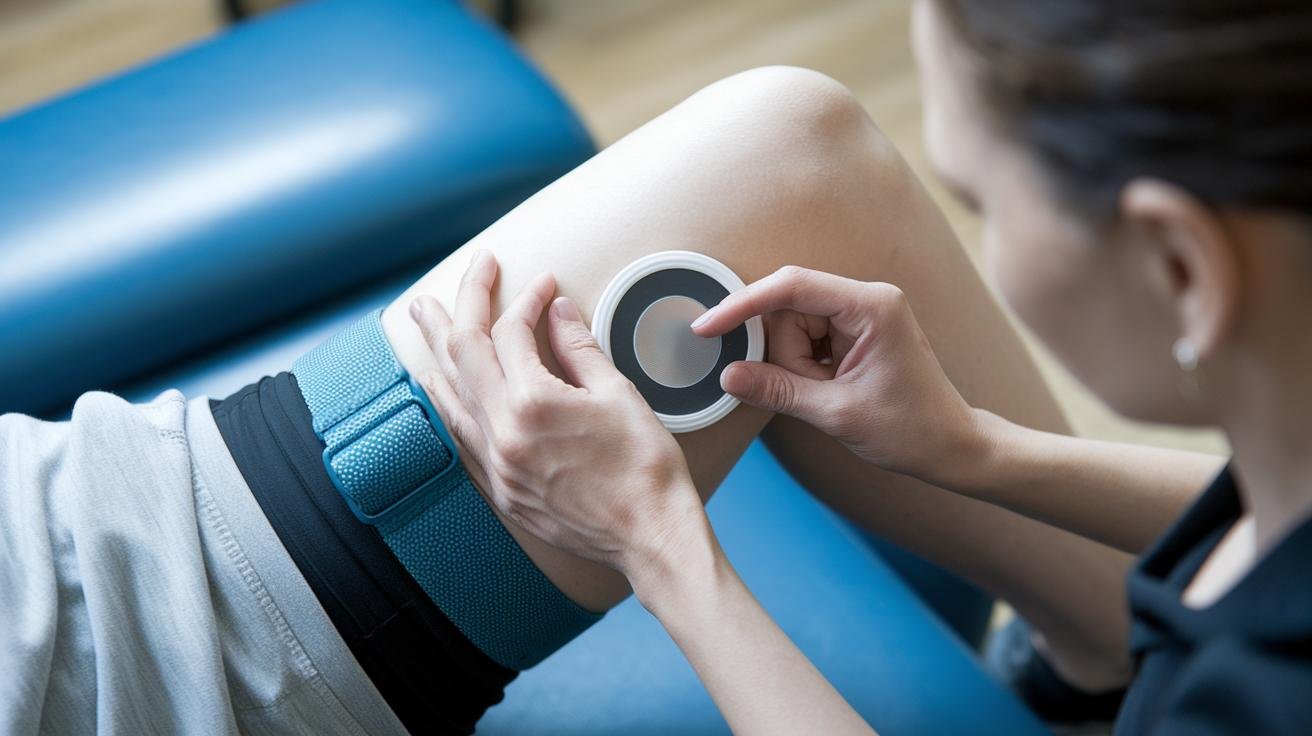
Knee
Place a circular coil over the kneecap (patella) or just above or below it to focus on meniscus or tendon areas. For broader coverage of quads and hamstrings, use a rectangular coil across the front of the thigh. Tuck the coil under snug clothing or wrap it with an elastic band to keep steady contact. -
Ankle
Set the coil over the malleoli (the bony bumps on each side of your ankle) or along the ankle joint line if the whole joint is sore. Use a small circular coil for the joint or a narrow rectangular pad to reach the calf-soleus area. Keep your foot relaxed and supported on a pillow or rolled towel. -
Hip and gluteal muscles
Use a larger rectangular or oval coil over the greater trochanter (the hip bone) or the bulk of the gluteal muscle to cover the whole area. Lie on your side or prop a pillow under you so the coil sits evenly against the skin. It feels a bit like a warm sunrise waking up your cells. -
Biceps and quadriceps
Lay a rectangular coil along the length of the muscle, matching the coil’s long axis to the muscle’s long axis. Treat one muscle group per session for a deeper, focused effect. Think of the coil as a mini massage that follows the muscle.
Quick practical tips:
- Secure coils with athletic tape, elastic bands, or sweat bands so they don’t move.
- Avoid thick cushions or heavy padding; they weaken the field.
- Treat one focused area at a time and check comfort often.
- If anything feels sharp or odd, stop and adjust the coil.
Oh, and here’s a neat trick: place a thin cotton layer between skin and coil for extra comfort without blocking the field.
Optimizing PEMF Session Setup: Frequency, Intensity, and Duration
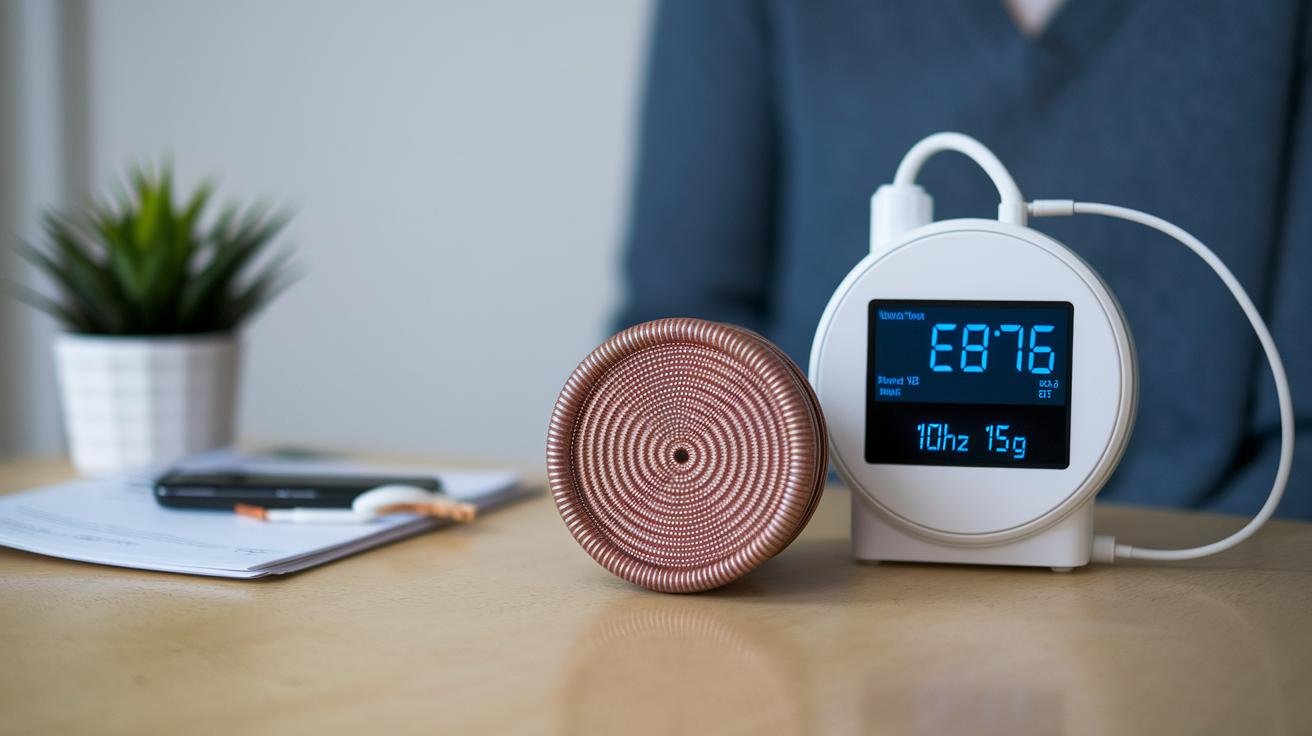
| Quick Setup |
|---|
| Goal → pick frequency (pain: 5–15 Hz; tissue repair: up to ~50 Hz). Example: “Pain relief: 10 Hz; Tissue repair: 40 Hz.” |
| Start intensity: 10–20 Gauss (Gauss is a unit of magnetic field strength) , raise slowly across sessions. |
| Session duration: 10–30 minutes. |
| Coil orientation & gap: coil flat, printed circle toward skin, gap ~0–2 cm. |
| Single-coil tip: choose single-coil for strongest local output and longer runtime. |
| Pre-start checks: battery charged, cables secure, user comfortable and still. |
PEMF (Pulsed Electromagnetic Field therapy) works like a gentle drumbeat for your cells. Pick a frequency that matches your goal. Lower rates feel calming and help with pain. Higher rates support tissue repair and metabolism. Think of 5–15 Hz as a slow, steady pulse and around 40–50 Hz as a brighter, faster rhythm.
Start low on intensity. Begin at 10–20 Gauss and give your body a few sessions to adapt. If you feel fine, raise intensity slowly over time. Small steps work best. Relax. Breathe.
Ramping protocol – raise intensity gradually across sessions until you find a comfortable working level. Try this simple plan: use 10–20 Gauss for the first 3–5 sessions, then increase by about 2–5 Gauss every 3–7 sessions if you’re feeling good. Example: Week 1: 10 Gauss; Weeks 2–3: 12–15 Gauss; Week 4: 15–18 Gauss. It’s gentle, steady progress.
Placement matters. Keep the coil flat with the printed circle facing the skin and a small gap of 0–2 cm unless you’re instructed otherwise. For focused, higher local output, use a single coil. Single-coil mode concentrates energy and gives longer runtime per battery. Using two coils splits power between them, which shortens runtime and can lower peak field strength at each coil. If you need more punch, go single-coil or bring a charged spare battery.
A few practical checks before you start: make sure the battery is charged, cables are snug, and the person is comfortable and still. Little things matter. They help the session feel smooth.
Quick troubleshooting tips:
- Tingling or discomfort? Lower the intensity or increase the gap and try again.
- Runtime falls fast when using two coils? Switch to single-coil mode or carry a charged spare battery.
- Signal seems weak? Check that cables are seated and the coil face is oriented correctly, then restart the device.
See the detailed placement sections and the target table for region-specific frequencies and distances. Oh, and if you ever feel unsure, start lower and go slower. You’ve got this.
🎁 Get a Free Wellness Gift
Enter your name and email below to receive a special wellness gift from OlyLife — absolutely free!
Safety Precautions and Troubleshooting for PEMF Coil Placement
PEMF (Pulsed Electromagnetic Field therapy) uses a gentle hum of energy to help tissues. Start with the big safety musts. Keep coils well away from any implanted metal or electronic device, like pacemakers or metal plates. Don’t place coils over open cuts, fresh wounds, or a pregnant belly. Take off watches, jewelry, and belts with metal before a session so the field stays focused on your tissue, not hardware.
Quick pre-session safety checklist (make sure each box is done):
- Remove metal jewelry and accessories.
- Confirm there are no implants or implanted electronics in the treatment area.
- Avoid placing coils on broken skin or directly over surgical incisions.
- Pick a quiet, level spot; lie or sit so the coil stays flat and still.
- If it’s your first session, start at low intensity and keep the time short.
Not sure when to stop or move the coil? Trust these signals:
- Any sharp pain, burning, strong tingling, or new numbness , pause and move the coil a little farther away or lower the intensity.
- If you feel faint, dizzy, or notice unusual heart sensations, stop and consult a clinician.
Troubleshooting checklist for placement problems:
- Coil feels weak or you don’t sense anything: check that the printed circle is facing the skin and the coil sits flat with a 0-2 cm gap. Think of it like laying a book flat on a table.
- Coil shifts during the session: secure it with a sweat band, an Ace wrap, or snug clothing; avoid thick padding that can blunt the field.
- Device runtime drops fast: running two coils splits power; try single-coil mode or swap in a charged battery.
- Strange device behavior: inspect leads and connectors for damage, reseat plugs, then reboot the unit.
Oh, and a neat trick: mark the coil’s center with a small sticker so you can line it up quickly next time. Next, if these small fixes don’t help, pause use and contact the device manufacturer or a healthcare professional for guidance.
Maintenance, Cleaning, and Calibration of PEMF Coils and Applicators
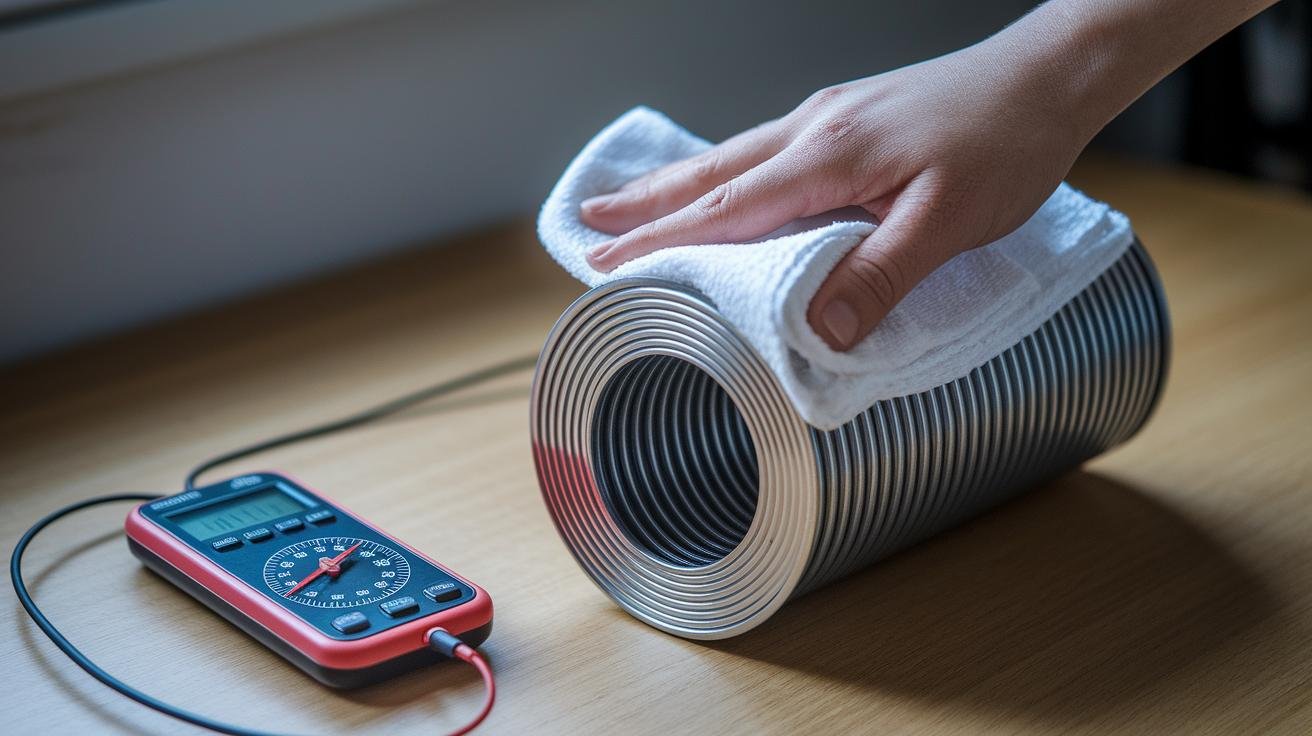
PEMF (Pulsed Electromagnetic Field therapy) coils and applicators need gentle care. After each use, unplug the leads, then wipe the coil face with a damp, lint-free cloth and a little mild soap. Be gentle. Don’t use alcohol, solvents, or abrasive cleaners, since those can wear away coatings and ruin padding. For step-by-step surface care, see how to clean and maintain a PEMF mat.
Before every session, do a quick visual check of the leads, plugs, and connectors. Look for frayed insulation, bent pins, or loose plugs. If a lead looks worn or a connector feels wobbly, stop using that part right away. Replace it or contact customer support. Keep a short maintenance log with dates and any fixes , it really helps if you need warranty service.
- Store coils flat in a cool, dry place away from direct sunlight and heavy objects.
- Avoid folding pads or making sharp creases in leads.
- Wipe up spills right away and let parts air-dry completely before reconnecting.
- Perform a calibration check once a year using the device’s built-in sensors or an external gauss meter (a tool that measures magnetic field strength). Record the readings in your log.
Have you ever felt a session seemed weaker than usual? If annual calibration drifts beyond the manufacturer’s specs, schedule a service check. A simple test and a quick note in your log save time later and keep your system working steadily.
Final Words
You practiced hands-on steps: finding landmarks, orienting the coil's printed circle to the skin, holding a 0–2 cm gap, choosing the right coil shape, and fastening with straps. You also ran through session settings, safety checks, and basic cleaning.
Quick tips: keep the coil flat, favor single-coil mode for a stronger field, and double-check connections and comfort. If something feels off, reposition and try a lower intensity.
Use this PEMF coil and applicator placement guide as a go-to checklist, and here’s to calmer days, easier recovery, and deeper sleep.
FAQ
What is proper magnet therapy placement?
Proper magnet therapy placement is positioning the magnet or coil over the target area or anatomical landmark, with the active side toward the skin, a 0–2 cm gap, flat contact, and gentle, secure fastening.
Where should I place magnets for back pain?
For back pain, place magnets over the lumbar spine at L3–L5 for lower pain and over T7–T12 for upper back, keeping a 0–2 cm gap and using a lumbar support belt to hold coils steady.
Is there a magnet therapy points PDF I can use?
A magnet therapy points PDF is a printable map showing landmarks and coil types; download one from your device maker or a trusted clinic, and match it to your coil shapes and safety notes.
Why does intensity matter in PEMF or magnet therapy?
Intensity matters because field strength dictates penetration depth and tissue response; higher Gauss reaches deeper, single-coil modes deliver stronger fields, and experts like Dr. Pawluk emphasize matching intensity to the goal.
What is a magnetotherapy device, like the bio stimulation MAG 700?
A magnetotherapy device, such as the MAG 700, produces pulsed or static magnetic fields for local therapy; devices vary in frequency, intensity, coil type, and recommended session settings from the manufacturer.
How does a magnetotherapy ring work?
A magnetotherapy ring works by placing a small magnetic field over finger joints to ease pain and support circulation; wear it snugly over the joint and follow the device’s session length and safety guidance.
How should I lie on a PEMF mat?
To lie on a PEMF mat, lie flat with the treated body parts centered, remove bulky cushions, wear light clothing, relax evenly across the mat, and set the program before you start the session.
How long should you lay on a PEMF mat, and can you use PEMF too much?
Typical PEMF mat sessions run 10–30 minutes; using mats daily is common but excessive total daily time may cause overstimulation—keep within manufacturer recommendations and stop if you feel dizziness or discomfort.
Does PEMF penetrate clothing?
PEMF penetrates light clothing, so thin shirts or shorts are fine, but thick cushions, heavy denim, or metal accessories weaken the field; keep the coil within 0–2 cm of skin for best effect.
How is magnetotherapy used in physiotherapy?
Magnetotherapy in physiotherapy is used as an adjunct for pain relief, swelling reduction, and tissue recovery, combined with exercise and manual care, with clinicians adjusting frequency, intensity, and placement per the condition.